


baitfish
Member
Paint job DIY
(i edited this first post so the DIY is on the first page)
Okays for those who want to know how i went about painting the ute, these are the steps i took. hopefully it makes sense.
Basic Tools and parts you will need.
All your hand tools for striping the ute
HVLP spray gun (Mine is a cheap scorpion 1.4mm HVLP)
Air Compressor, you'll need a decent size one, mine is 3hp, 10cfm.
water trap filter combo and regulator. clean dry air is a must!
Good size air lines
Sanding blocks, i used a cork one and a larger SCA plastic one.
tac cloths
lint free cloths or some clean rags
4L of cleaning thinners
4L of your undercoat + hardner + thinners
4L of you base color + hardner + thinners
Plenty of rolls of high temp masking tapes, thick rolls and thin rolls
Masking paper, i used one and a bit 50m rolls
Wax and Grease remover 1L
wet and dry sanding paper, i used fair few sheets of 400 grit and 320 grit
Scotch brite pads
plus plenty of other stuff that i forgotten at the moment
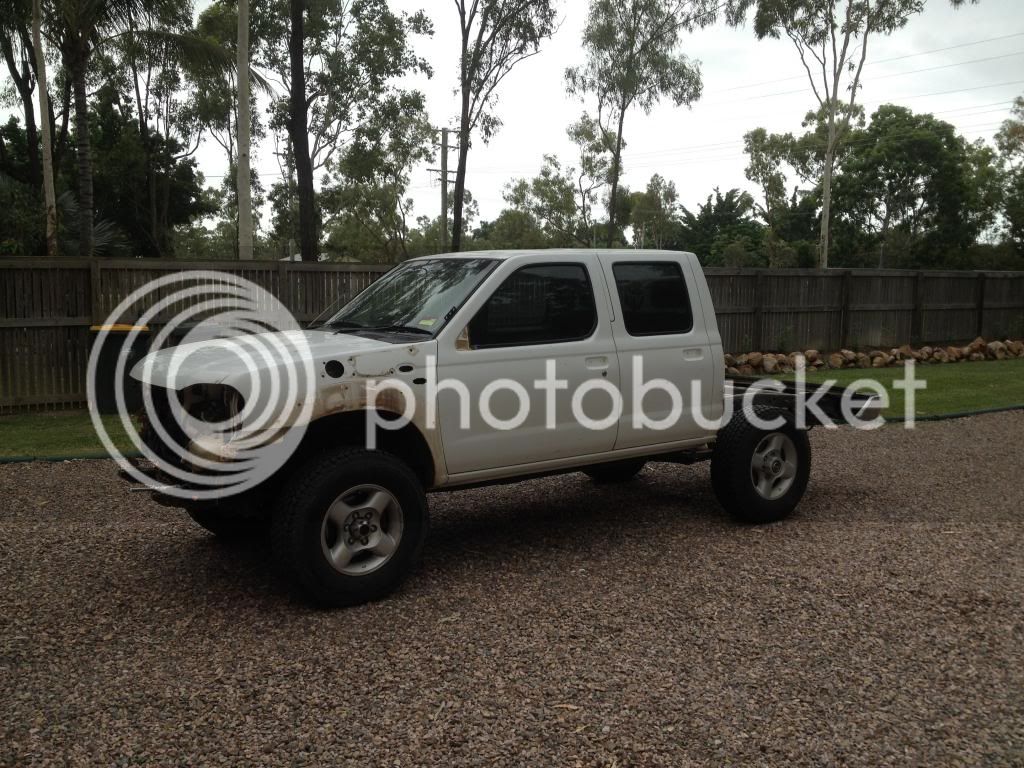
1. Strip the ute. the more you can pull off the less you have to tape up! i pulled everything off, door handles, bullbar, tray, side steps, head lights, grill, indicators and snorkel.
2. Give it a really really good wash. I used a truck wash on mine. make sure the wash has no wax in it. Anything heavy duty that doesn't leave any residue will do. I also used a high pressure washer to give it a really good working over.
3. While the ute is out and wet, grab some wet and dry sand paper, i used 400grit but 320grit will do the job too. The blokes at protect also said you can use scotch brite pads. they last a lot longer and scuff the paint easily. So the aim is to take all the shine off the paint, every bit of paint that you wish to paint again needs to be scuffed.
4. If you have any rust spots on the ute, now is the time to rub these spots back to metal. Some times you'll find that the rust has run off in lines under the paint, follow these lines rubbing back the paint. No need to rub it back in straight lines, you need smooth, feathered back paint to metal.
5. Give the ute another good wash to remove all the rubbed off paint and material. i didnt use any product in my water this time, just a sponge and clean water. Dry the car off with a chamois or the like and park it where you will be painting.
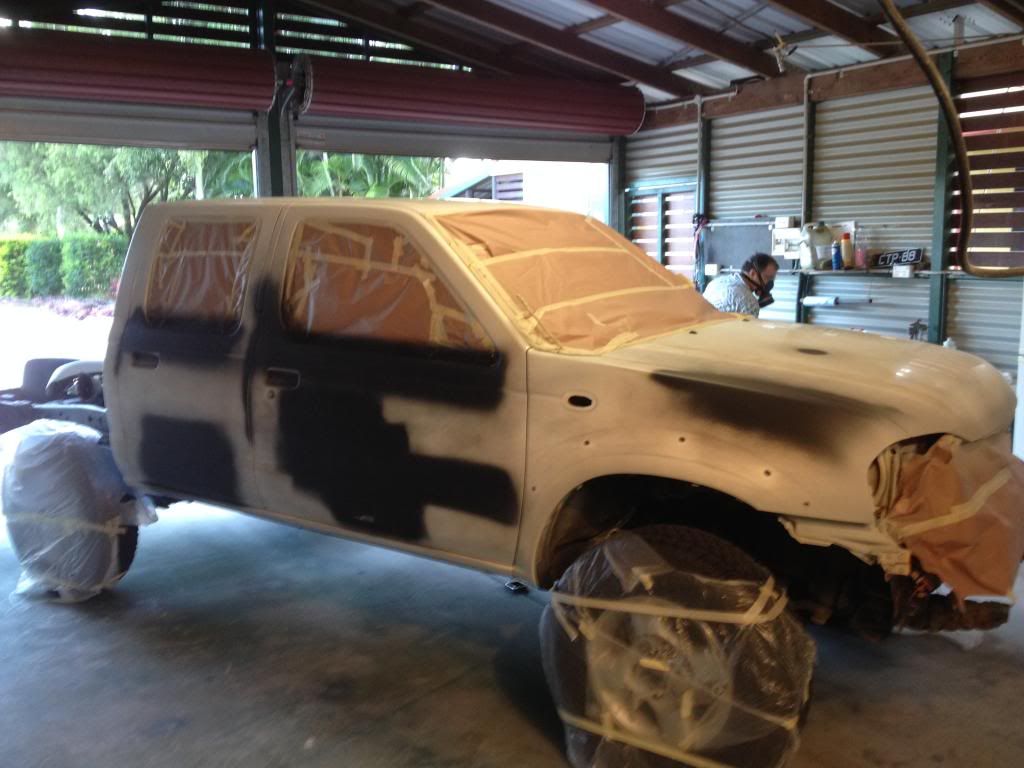
6. If you have rubbed any areas back to metal you will now need to use an etch primer on these. I used a protec 426 super etch primer. Wipe the metal and surrounding paint work down with wax and grease remover and put a light coat of etch primer onto the area. Leave this to dry and then use a scotch brite pad to stuff this primer up. (note you may need to tape up areas like glass and trims that you will not be painting )
7. Bog time, get some soft panel filler, some rough sand paper and watch some youtube videos. its an art form just to pick up the dents, let alone fill them with just enough filler and then sand it back with the panel. My tips would be only use just enough, the more you add the more you have to sand off and that sucks! another tip is to use a large sanding block and follow the panel in a cross hatch motion. the more of the panel you follow, the more of a guide it will act as. You'll be tempted to just rub the bog down, but if you do that you'll create low and high spots. Once its to the right level, use some 400 to smooth it all out.
8. Time to tape, this job is a pain but you need to do it properly, over spray will make it everywhere! the obvious place like the windows and black trim need to be done, but also inside all the door panels, all the rubbers and engine bay cracks, pretty much any way air can get to over spray will make it in. i thought i did a good job on mine but i still ended up with over spray in the engine bay. I used masking tape from protect and they have rolls of paper there for like $5. Don't use cheap dogey tape, it leaves crap behind or it holds on to well and tares the paint when you remove.
9.Wax and Grease remover time! i just used some septone stuff from super cheap because that's what i had, but protec has better and cheaper stuff. wipe the whole ute over, every surface that is going to be painted. the stuff i had said to wipe it over, then use another rag to dry it off. Read the instructions on the tin and follow that. if bits of cloth get left behind it wont hurt to run over the whole ute with a tac cloth. cost like $2 at protect and they pick up every little bit of dust and cloth that it touches.
10. Undercoat time. I used a protec High Fill 2k undercoat,
( http://www.protec.com.au/secure/downloadfile.asp?fileid=1003666 ) this stuff fills nicely and does not shrink once it fully dries. Mix up the under coat according to the tech sheet. They sell mixing cups, with all the markings on the side, 2 to 1, 4 to 1 and so on, plus the percentage markings for the thinners. They cost like $0.70 each, so get a few and just toss them after you use them, much easier then trying to clean them up. I used a gravity feed, HVLP gun, scorpion brand with 1.4 hole, Cost about $60 for Autobahn. They recommend a 1.8mm gun but i didn't have that size and didnt want to buy another gun. I just thinned the undercoat about to around 35 to 40% rather than the 10 to 30% that was recommended in the tech sheet.
The Tech sheet will stipulate how many coats and what flash time to run with. With my job, we did three coats, with only 5 minutes flash time. So pretty much by the time you finish coating the ute, you'll need to go back the first panel and start again.
Leave the ute to dry for a couple of hours, then spray a ghost coat of flat black rattle can paint over the whole paint job. You only need to have a fine mist of black dots over the ute to use as a guide for rubbing in the next step. i left mine over night in the shed so the undercoat could fully dry.
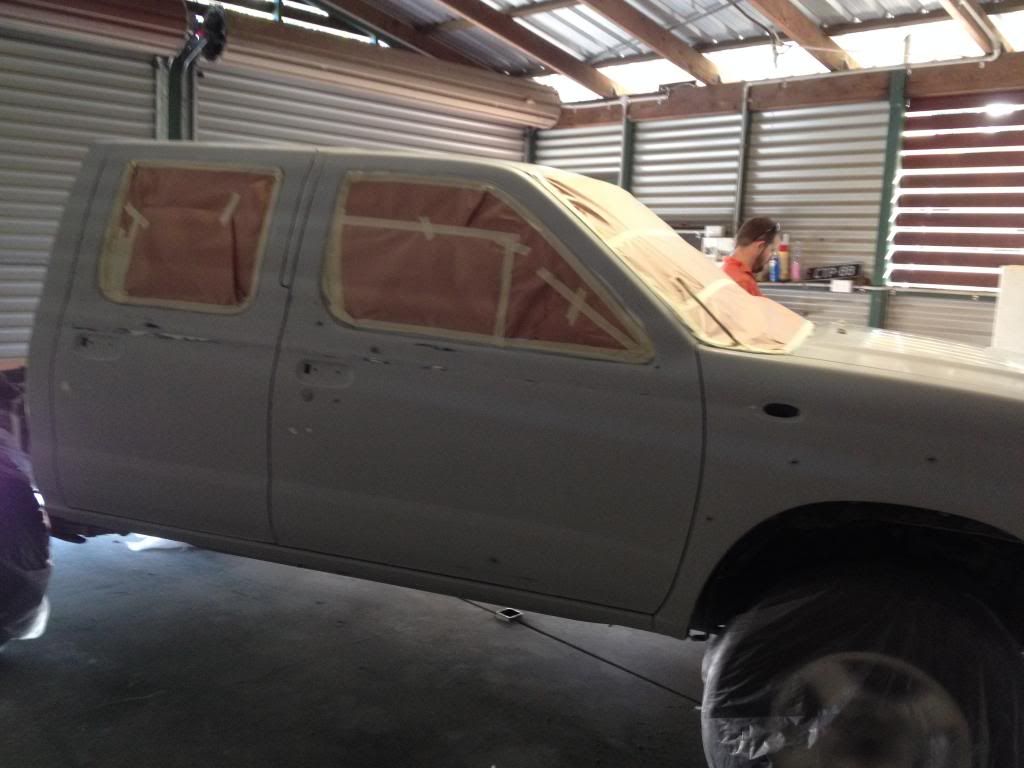
11. Sanding time again. You can go one of two ways now, wet sanding or dry sanding. I tried dry sanding first, that way i didnt have to remove the paper and tape, sadly it didn't work for me. The undercoat would clog the paper up nearly straight away, progress was very slow. So wet sanding came next. Remove all the paper and put the ute outside on the grass or somewhere in the shade. Grab a garden hose and just have the water trickling out and start rubbing. I used a cork block and 400 sand paper, tech sheet says to use 800 but that makes for a very long process, but a smoother finish so its up to you which way you go. The aim is to rub all the undercoat back smooth as without going through to the original paint, hence the black ghost coat. It acts as a guide so you know what has been rubbed and what hasnt been rubbed. rub the ghost coat off in small sections while the hose is running over the area. run your hand over the area and feel for any rough spots if there is none, move to the next section.
12. Wash the ute with clean water, make sure to remove any residue left from the rubbing. Chamois the ute down and leave it dry in the sun. Park it back in the shed or where you are painting and mask the car up once again! same as in step 8.
13. Wax and grease remove the whole ute again, then tac rag it down.
14. Paint time. I used Protec 625 polythane paint, colour coded to BQM1.
http://www.protec.com.au/secure/downloadfile.asp?fileid=1003744
So this was my favorite part of the job, but was the one i was most nervous about. Getting runs and orange peel at this stage means for a lot more work after the job is done or maybe having to do it again. Setting the gun right and have the right technique is critical, there is a lot of videos on youtube about setting you air supply, fan control, fluid control, and how to use the guns. i would recommend studying these for a few days, then practice, on the masking paper or better yet, flat sheet metal off cuts. Using the off cuts allows you to see the paint dry and see what the finish is like.
The Tech sheets will guide you on how to mix the paint, be sure to use a strainer, (they are like $0.10 each and save a lot of trouble) when putting it into the gun. I used the same HVLP gun that i used for the under coat. it got a very good cleaning after the under coat, stripped all the parts out and cleaned with thinners. The closer the gun is like to new, the better you can spray with it.
Again the tech sheet will give you a guide on laying down the coats, i went three coats instead of the 2 coats. Flash time was around 15mins between coats. The youtube videos are great for showing what order to paint the car in, how to follow on wet edges, how much over lap on each pass, speed, and so on. Its hard for me to explain, you're much better off watching some videos or better yet have someone show you.
Once its finished, leave the ute to dry, i left mine for about 24hours before i parked it outside in the sun to let it finish drying off. They guys at protect saifd full cure happens in about 7 days.

I painted my bull bar white as well, and pretty much followed the exact same method as i used for the ute. i painted my flares in the same manner. I painted my door handles in satin black, just out of a pressure pack and also the side mirror bases got satin black. i did have to buy a plastic primer for these parts and i didnt put a undercoat on them.
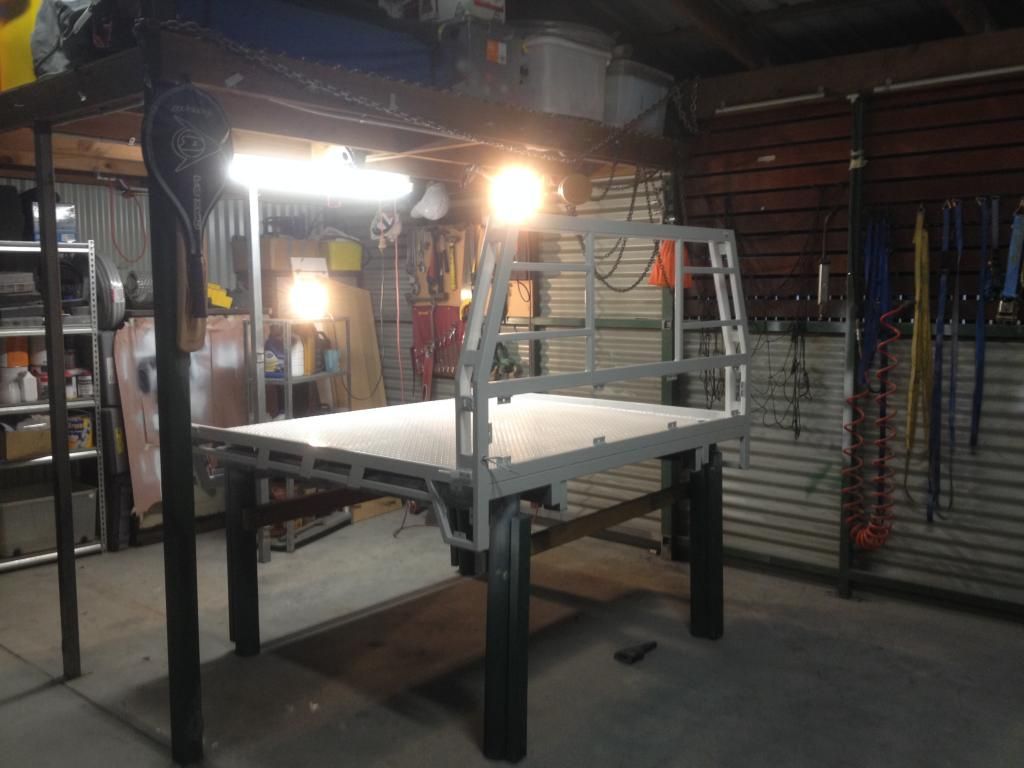
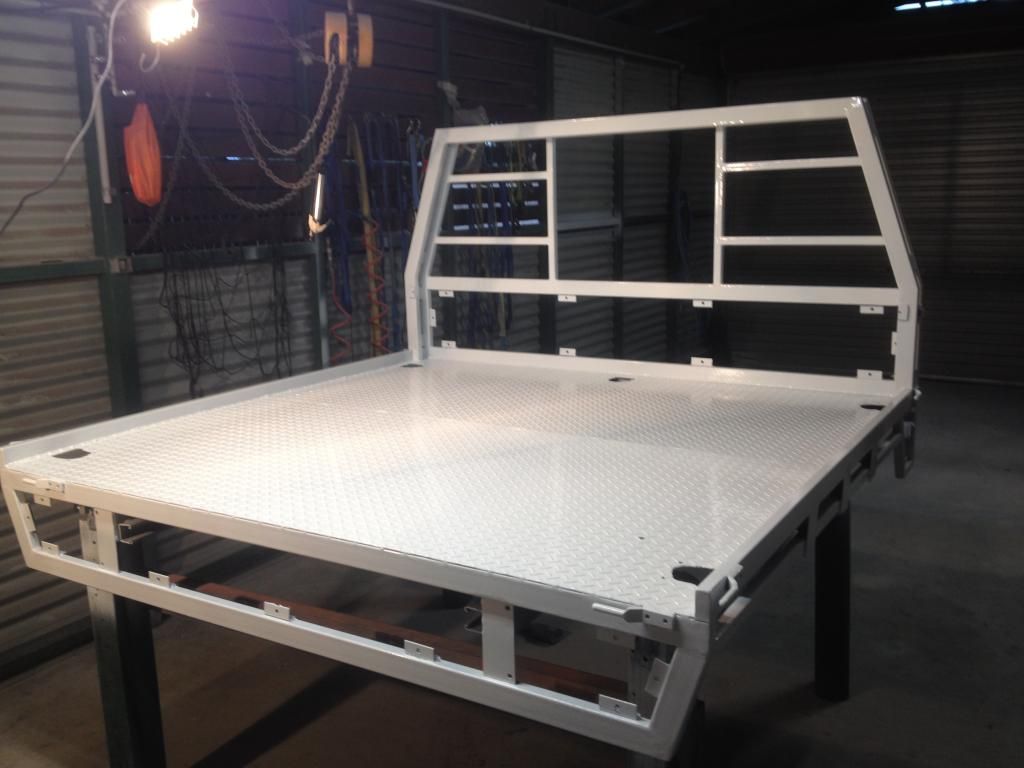
So thats the general way you can go about painting your ute. Just make sure you have plenty of time up your sleeve, it took me about 4 days to do the cab, my tray is still waiting for me.
(i edited this first post so the DIY is on the first page)
Okays for those who want to know how i went about painting the ute, these are the steps i took. hopefully it makes sense.
Basic Tools and parts you will need.
All your hand tools for striping the ute
HVLP spray gun (Mine is a cheap scorpion 1.4mm HVLP)
Air Compressor, you'll need a decent size one, mine is 3hp, 10cfm.
water trap filter combo and regulator. clean dry air is a must!
Good size air lines
Sanding blocks, i used a cork one and a larger SCA plastic one.
tac cloths
lint free cloths or some clean rags
4L of cleaning thinners
4L of your undercoat + hardner + thinners
4L of you base color + hardner + thinners
Plenty of rolls of high temp masking tapes, thick rolls and thin rolls
Masking paper, i used one and a bit 50m rolls
Wax and Grease remover 1L
wet and dry sanding paper, i used fair few sheets of 400 grit and 320 grit
Scotch brite pads
plus plenty of other stuff that i forgotten at the moment
1. Strip the ute. the more you can pull off the less you have to tape up! i pulled everything off, door handles, bullbar, tray, side steps, head lights, grill, indicators and snorkel.
2. Give it a really really good wash. I used a truck wash on mine. make sure the wash has no wax in it. Anything heavy duty that doesn't leave any residue will do. I also used a high pressure washer to give it a really good working over.
3. While the ute is out and wet, grab some wet and dry sand paper, i used 400grit but 320grit will do the job too. The blokes at protect also said you can use scotch brite pads. they last a lot longer and scuff the paint easily. So the aim is to take all the shine off the paint, every bit of paint that you wish to paint again needs to be scuffed.
4. If you have any rust spots on the ute, now is the time to rub these spots back to metal. Some times you'll find that the rust has run off in lines under the paint, follow these lines rubbing back the paint. No need to rub it back in straight lines, you need smooth, feathered back paint to metal.
5. Give the ute another good wash to remove all the rubbed off paint and material. i didnt use any product in my water this time, just a sponge and clean water. Dry the car off with a chamois or the like and park it where you will be painting.
6. If you have rubbed any areas back to metal you will now need to use an etch primer on these. I used a protec 426 super etch primer. Wipe the metal and surrounding paint work down with wax and grease remover and put a light coat of etch primer onto the area. Leave this to dry and then use a scotch brite pad to stuff this primer up. (note you may need to tape up areas like glass and trims that you will not be painting )
7. Bog time, get some soft panel filler, some rough sand paper and watch some youtube videos. its an art form just to pick up the dents, let alone fill them with just enough filler and then sand it back with the panel. My tips would be only use just enough, the more you add the more you have to sand off and that sucks! another tip is to use a large sanding block and follow the panel in a cross hatch motion. the more of the panel you follow, the more of a guide it will act as. You'll be tempted to just rub the bog down, but if you do that you'll create low and high spots. Once its to the right level, use some 400 to smooth it all out.
8. Time to tape, this job is a pain but you need to do it properly, over spray will make it everywhere! the obvious place like the windows and black trim need to be done, but also inside all the door panels, all the rubbers and engine bay cracks, pretty much any way air can get to over spray will make it in. i thought i did a good job on mine but i still ended up with over spray in the engine bay. I used masking tape from protect and they have rolls of paper there for like $5. Don't use cheap dogey tape, it leaves crap behind or it holds on to well and tares the paint when you remove.
9.Wax and Grease remover time! i just used some septone stuff from super cheap because that's what i had, but protec has better and cheaper stuff. wipe the whole ute over, every surface that is going to be painted. the stuff i had said to wipe it over, then use another rag to dry it off. Read the instructions on the tin and follow that. if bits of cloth get left behind it wont hurt to run over the whole ute with a tac cloth. cost like $2 at protect and they pick up every little bit of dust and cloth that it touches.
10. Undercoat time. I used a protec High Fill 2k undercoat,
( http://www.protec.com.au/secure/downloadfile.asp?fileid=1003666 ) this stuff fills nicely and does not shrink once it fully dries. Mix up the under coat according to the tech sheet. They sell mixing cups, with all the markings on the side, 2 to 1, 4 to 1 and so on, plus the percentage markings for the thinners. They cost like $0.70 each, so get a few and just toss them after you use them, much easier then trying to clean them up. I used a gravity feed, HVLP gun, scorpion brand with 1.4 hole, Cost about $60 for Autobahn. They recommend a 1.8mm gun but i didn't have that size and didnt want to buy another gun. I just thinned the undercoat about to around 35 to 40% rather than the 10 to 30% that was recommended in the tech sheet.
The Tech sheet will stipulate how many coats and what flash time to run with. With my job, we did three coats, with only 5 minutes flash time. So pretty much by the time you finish coating the ute, you'll need to go back the first panel and start again.
Leave the ute to dry for a couple of hours, then spray a ghost coat of flat black rattle can paint over the whole paint job. You only need to have a fine mist of black dots over the ute to use as a guide for rubbing in the next step. i left mine over night in the shed so the undercoat could fully dry.
11. Sanding time again. You can go one of two ways now, wet sanding or dry sanding. I tried dry sanding first, that way i didnt have to remove the paper and tape, sadly it didn't work for me. The undercoat would clog the paper up nearly straight away, progress was very slow. So wet sanding came next. Remove all the paper and put the ute outside on the grass or somewhere in the shade. Grab a garden hose and just have the water trickling out and start rubbing. I used a cork block and 400 sand paper, tech sheet says to use 800 but that makes for a very long process, but a smoother finish so its up to you which way you go. The aim is to rub all the undercoat back smooth as without going through to the original paint, hence the black ghost coat. It acts as a guide so you know what has been rubbed and what hasnt been rubbed. rub the ghost coat off in small sections while the hose is running over the area. run your hand over the area and feel for any rough spots if there is none, move to the next section.
12. Wash the ute with clean water, make sure to remove any residue left from the rubbing. Chamois the ute down and leave it dry in the sun. Park it back in the shed or where you are painting and mask the car up once again! same as in step 8.
13. Wax and grease remove the whole ute again, then tac rag it down.
14. Paint time. I used Protec 625 polythane paint, colour coded to BQM1.
http://www.protec.com.au/secure/downloadfile.asp?fileid=1003744
So this was my favorite part of the job, but was the one i was most nervous about. Getting runs and orange peel at this stage means for a lot more work after the job is done or maybe having to do it again. Setting the gun right and have the right technique is critical, there is a lot of videos on youtube about setting you air supply, fan control, fluid control, and how to use the guns. i would recommend studying these for a few days, then practice, on the masking paper or better yet, flat sheet metal off cuts. Using the off cuts allows you to see the paint dry and see what the finish is like.
The Tech sheets will guide you on how to mix the paint, be sure to use a strainer, (they are like $0.10 each and save a lot of trouble) when putting it into the gun. I used the same HVLP gun that i used for the under coat. it got a very good cleaning after the under coat, stripped all the parts out and cleaned with thinners. The closer the gun is like to new, the better you can spray with it.
Again the tech sheet will give you a guide on laying down the coats, i went three coats instead of the 2 coats. Flash time was around 15mins between coats. The youtube videos are great for showing what order to paint the car in, how to follow on wet edges, how much over lap on each pass, speed, and so on. Its hard for me to explain, you're much better off watching some videos or better yet have someone show you.
Once its finished, leave the ute to dry, i left mine for about 24hours before i parked it outside in the sun to let it finish drying off. They guys at protect saifd full cure happens in about 7 days.
I painted my bull bar white as well, and pretty much followed the exact same method as i used for the ute. i painted my flares in the same manner. I painted my door handles in satin black, just out of a pressure pack and also the side mirror bases got satin black. i did have to buy a plastic primer for these parts and i didnt put a undercoat on them.
So thats the general way you can go about painting your ute. Just make sure you have plenty of time up your sleeve, it took me about 4 days to do the cab, my tray is still waiting for me.
Last edited:


") haha
haha